
Hexes
- The Italianmoose

- Jan 9, 2021
- 2 min read
Phew! It's been a busy few months for me. Sorry I haven't been able to write much! One thing that I've been meaning to write up for a while is how to do hexagonal patterns in Fusion360, as it's something I had to dig around to work out how to do. You can see the sort of effect I'm going for in the image below of my slightly revised Wraith design.

To show how to do this, I'll start off with a nice simple block.

Next we want to create the sketch from which we'll do our patterning. I used a polygon (In a sketch, Create -> Polygon -> any of the options). I constrained it to have the top edge horizontal, and be 15 mm face to face. Next create two little construction lines, one going from the centre to the middle of the bottom edge and the other going from the centre of the polygon to the middle of the edge next to the first. I then added two lines co-linear to these which allow me to position the sketch so the pattern requires the minimum number of bodies. Other times I've just eyeballed it! This technique does use quite a lot of bodies though, so be prepared for the odd slowdown.

Extrude this sketch such that it will dig into the main block a little bit. With resin printing you can get away with down to around 0.15 mm of a cut and get a decent result.

You'll need to show the hexagon sketch again, using the eye symbol next to the sketch. Next you'll need the rectangular pattern tool, shown here:

Once you've opened it up, change type to "bodies" (you can also do this with components). Click on the box next to "Objects" and then select our hexagon. Click on the box next to "Directions" and select the two construction lines we created earlier.

I prefer to set "Distance Type" to "Spacing" and add the number of repetitions needed in both directions to cover the face you're trying to pattern. If you want you can suppress the bodies you don't need but I usually can't be bothered to do that much clicking.

Hit OK and Fusion will generate your pattern as a new set of bodies. Now you can use the bodies to cut away from the block.

Hit up the combine tool:

For the target body, select the block. Then do a rectangular select of all the hexagon bodies. There will be lots of them! Change "Operation" to "Cut", and make sure "Keep Tools" is deselected.
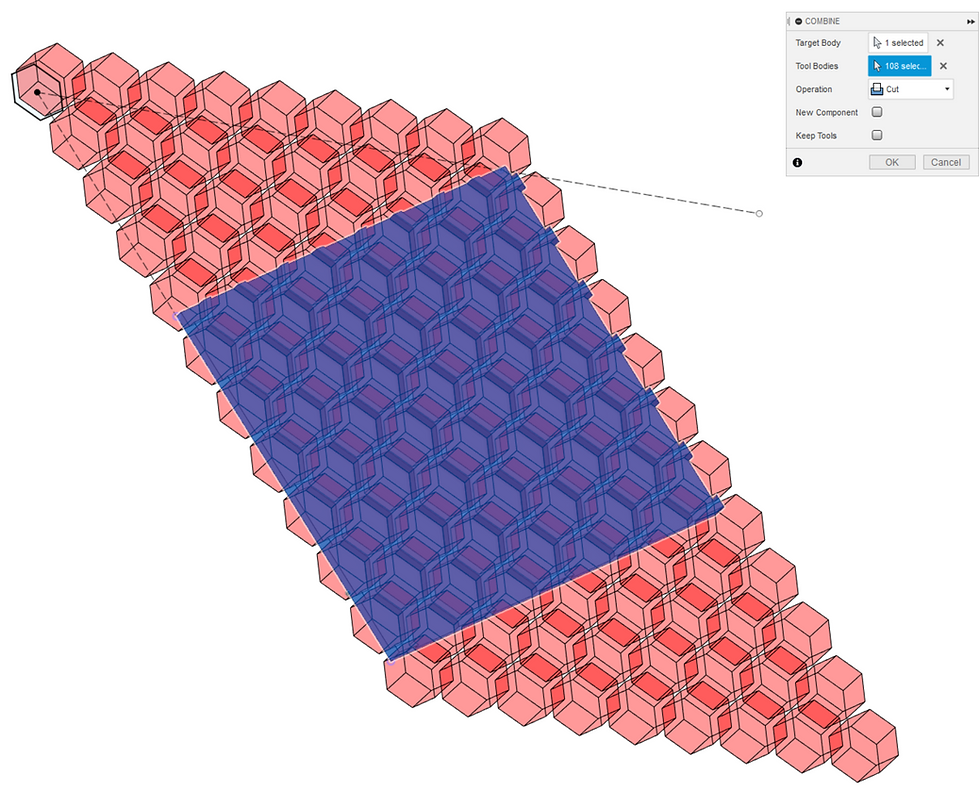
Hit OK, and it will perform the intersection to give a lovely hexagonal pattern!


Comments