
Printing/Painting Update
- The Italianmoose

- Jun 9, 2020
- 4 min read
It's been a bit quiet on the modelling front as I've been doing my best to chow down on the enormous pile of prints that needed finishing. Finally cleared the worst of it. I thought it might be useful to document what's been working and what's not.
Recently I upgraded to a Titan Aero extruder and a 0.15 mm nozzle, both from e3d in the UK. The extruder is great, it's much more reliable than my old cheap-and-cheerful one. A good 0.15 mm nozzle is a lovely thing for detailed work, but it's a nightmare to print reliably. Your first layer becomes make-or-break. Almost all of my print failures have been that first layer going down wrong. The bed needs to be very, very level. I use a glass sheet clipped to the top of the heat bed. It's flat, but the X/Y movement also needs to be flat which can be an issue especially if your print head has hit the bed at any point. I have a Prusa style printer so I can ensure the gantry is level with a set of callipers at both ends, with some hand rotation of the second Z-axis motor to set it. Rafts or brims are great for getting good bed adhesion. The temperatures I use are 182 degrees C for the hot end and 55-60 for the bed. The bed is set a little hot for what I think the surface of the glass really is as the coupling between the heater element and the glass is very poor.
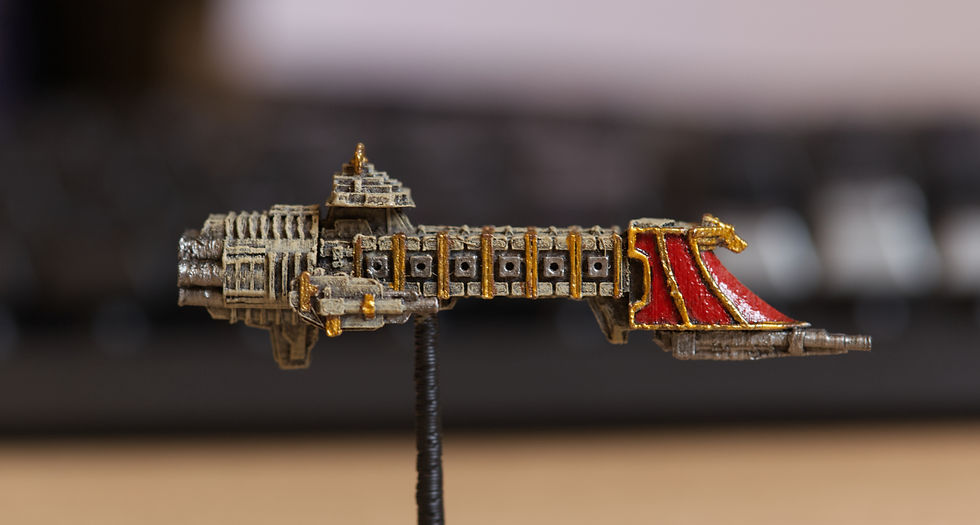
These first two Imperial ships were printed at a nominal layer height of 0.1 mm, although I make a lot of use of Cura's adaptive layer heights, so the height can be anywhere between 0.06 and 0.14 in this case. I managed to crack the Overlord's spine while forcing the gun bays in. Small nozzles and low print temperatures have very poor layer adhesion! But I have little to no stringing and overhangs are moderate. Tiny nozzles do really struggle with overhangs, even with supports. That's why some of the ribbing and turrets haven't come out so well. Support material is very easy to remove which is good. I'm a very lazy painter so I use a lot of drybrushing and washes. This has the definite downside that any layer lines shine through. I used to try to paint by ships white, a bad idea because it's very hard to make the jump to white from any other colour. Now I go for a manky off-white because it's easier to do and looks better. I've also realised red prows look great with the white-and-gold, so now I have to go back and redo everything else! I think I'll call this Battlefleet Beige.

Eldar ships are a nightmare in FFF. Smooth surfaces need a very rigid printer. Any slop or wobble and your hulls will look like mine! The second print I sanded to see how effective it was. Sanding PLA is fairly easy and does give a pretty good result, although you lose raised surface detail. Really reducing print acceleration reduces the forces exerted on the printer frame and the results do improve. Additional testing I've done indicates that line widths greater than your nozzle width results in a small but noticable improvement to surface quality.
I cheated painting the highlights, and painted the brightest colour first, then the second, and finally the base coat. I find it much easier to control the highlight thickness this way. I used the rough sail surface to pick up some drybrushed colour to make the flat expanse a bit more interesting.


This last series shows the impact of the reduction in nozzle size, and some of my wrestling with print orientations and supports. The cruisers were printed with combinations of parts done on the new extruder with a 0.4 mm nozzle and with a 0.15 mm nozzle. I also had a change of filament part way through (RIP Rigid.Ink filaments). I would class these models as barely servicable. You can also spot the bases done with the new and old nozzles before I'd done any proper calibration. Almost all of my models have been designed to print in parts in various orientations. As a rule one flat face will be on the print bed with the other horizontal at the top. The Mechanicus midsections do a lot better printed bottom-upwards because of all those ridges. The prows do best done at an angle to the backward face because of the number of curved surfaces. It's very clear where the prow has gone wrong!


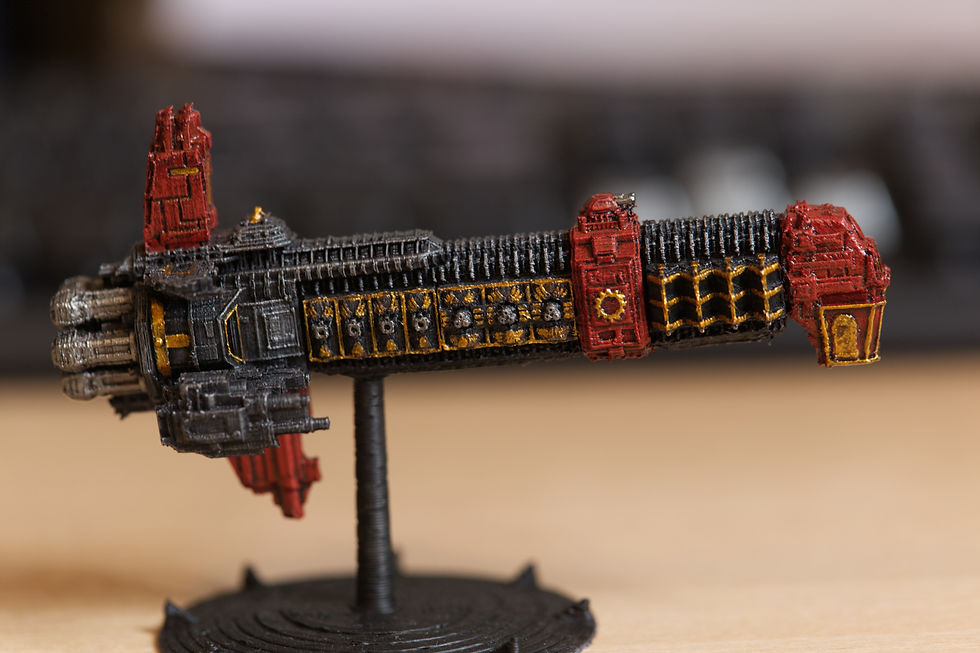
This final model is one I'm finally fairly happy with. This was done on the upgraded printer. However the supports were too close to the main model and so I lost all the underside detail in removing them! I'm still struggling with the thrusters but overall it's gone well. A new set of brushes was also timely in allowing me to pick out the fiddly details which are at last coming through clearly in the print.
The practical upshot from all this is that a good quality extruder and a well-machined nozzle can really make a difference in fine details, but there's a lot of hair pulling before you get usable prints out of them! Resin prints, of course, blow these out of the water. If you want any advice on filament printing don't hestitate to drop me a line and I'll see what I can do.


Hi, I just came over to say that I love your AdMech models and have been printing off your T'au ones for a friend. 10/10 work. I'd love to see you take a crack at the Inquisition ships with their differing Imperial designs. (I've been printing them off on an Egloo Mars Pro, they look really good in resin.)